
How to connect your café to OwnCup
The complete process from sign-up to welcoming your first guest: the place profile, offers, the QR code and staff permissions. Which features you get depends on your plan.
What to have ready
Connecting takes about half an hour, and most of that time is spent completing the profile. To avoid interruptions, collect in advance: a work email address for the confirmation code; a phone number for contact; the company tax number; a few photos of the room and the menu; opening hours per day, including breaks and days off.
The place has to exist on the map — the profile is created by picking a place from the directory, not by typing an address by hand.
Step by step
- 01
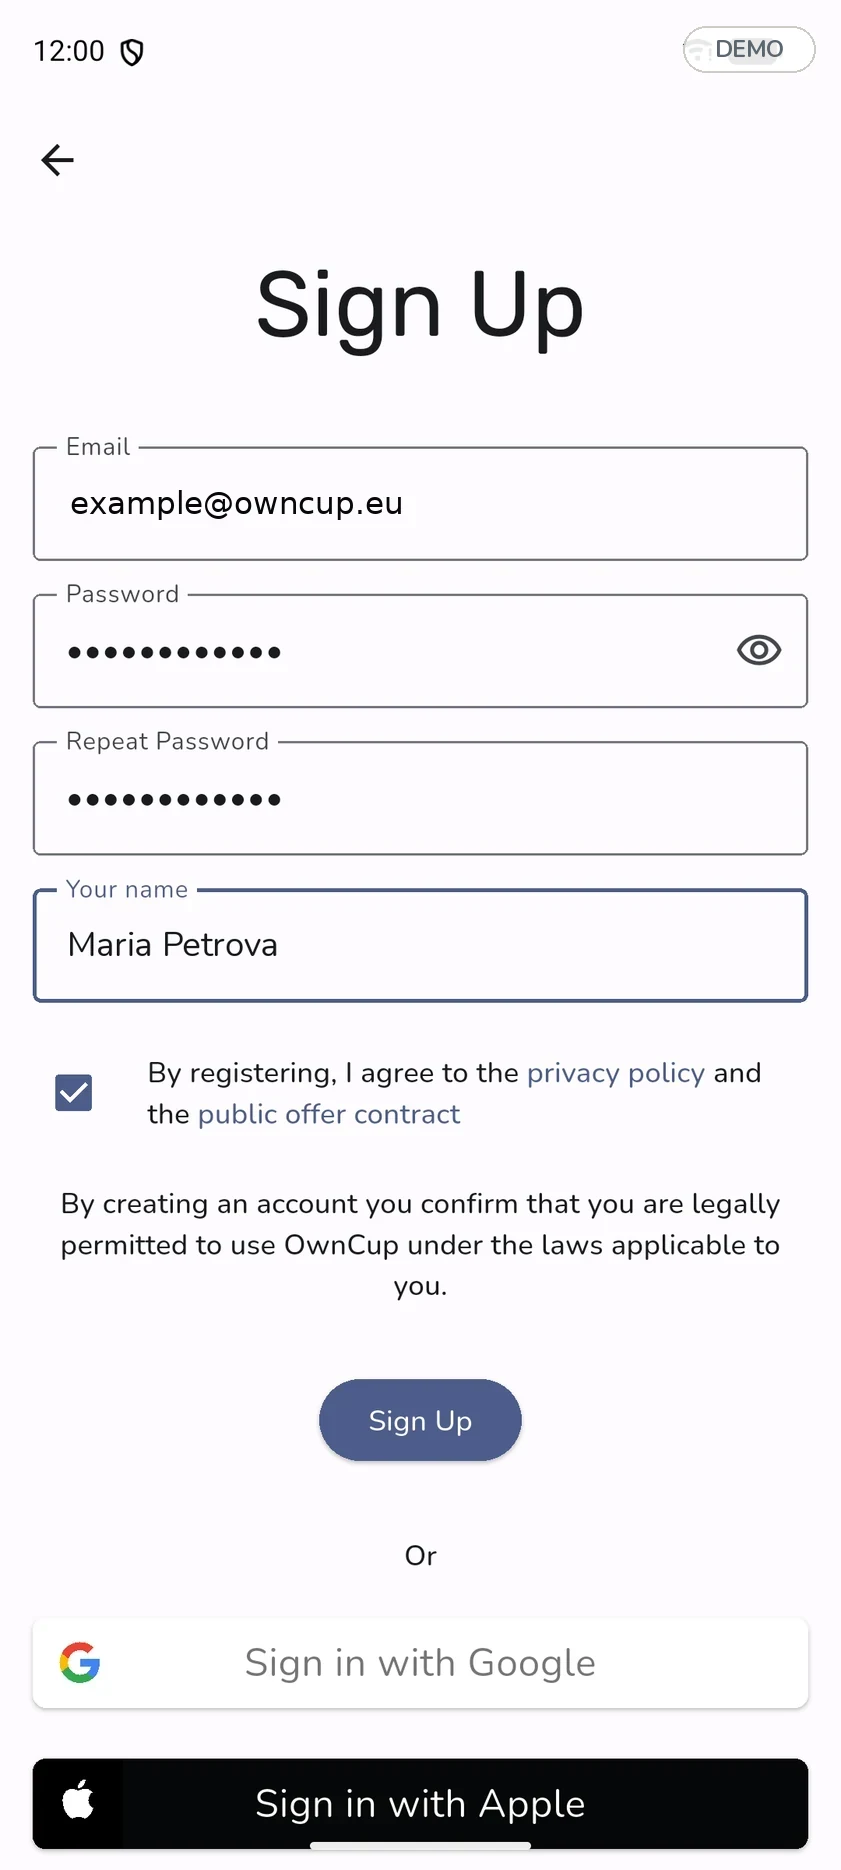
Sign up in the app
Fill in email, password and name, then confirm the email with the code from the message. You can also sign in with Google or Apple — then no password is needed.
The code arrives within seconds. If it does not, check the spam folder.
- 02
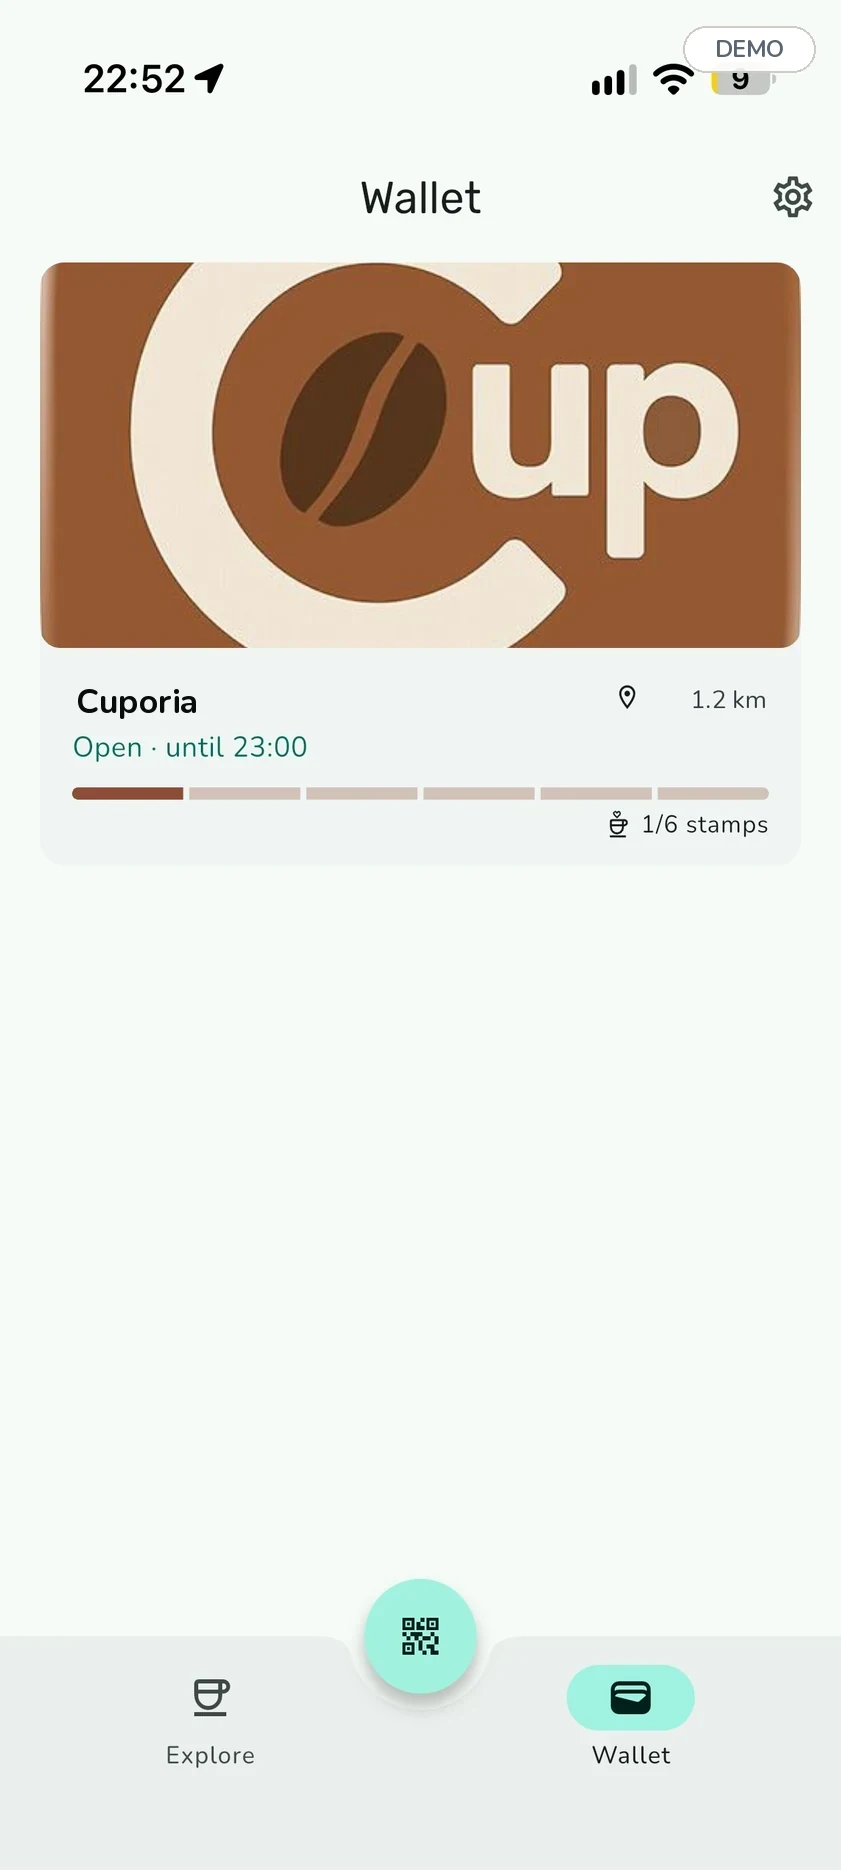
Open the app settings
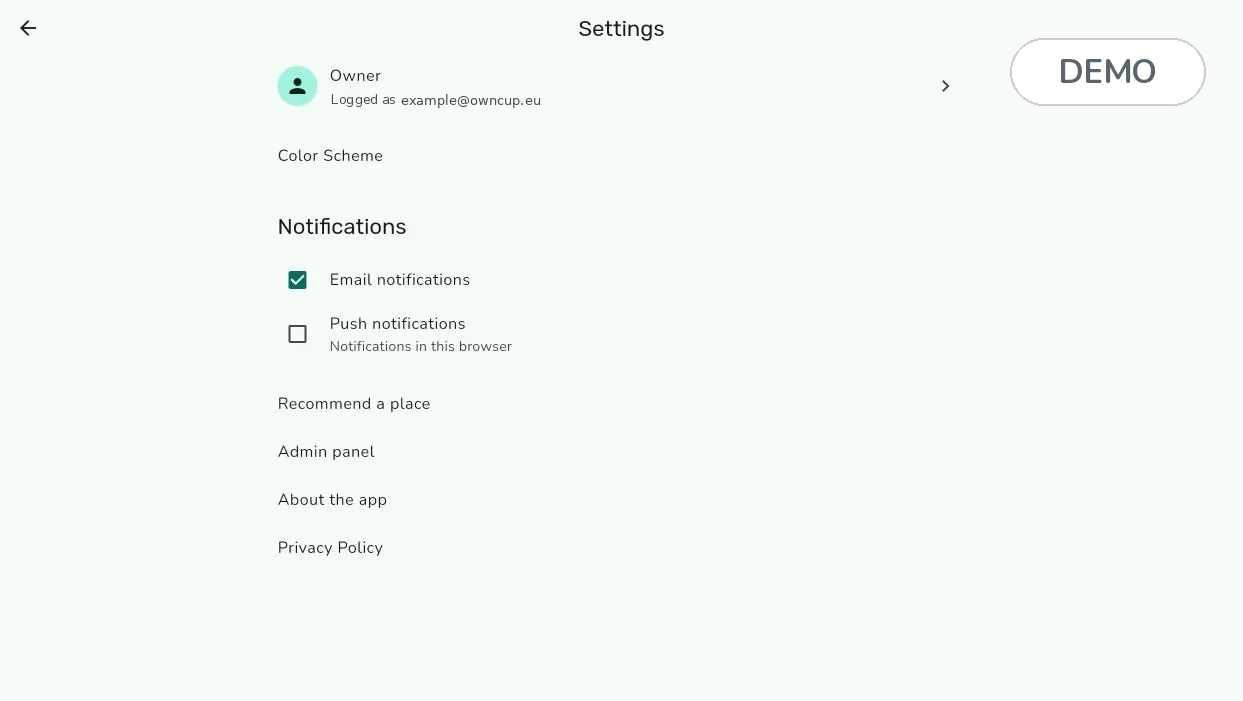
There is no “add a place” button on the main screen. Open Wallet and tap the gear icon in the top right corner.
- 03
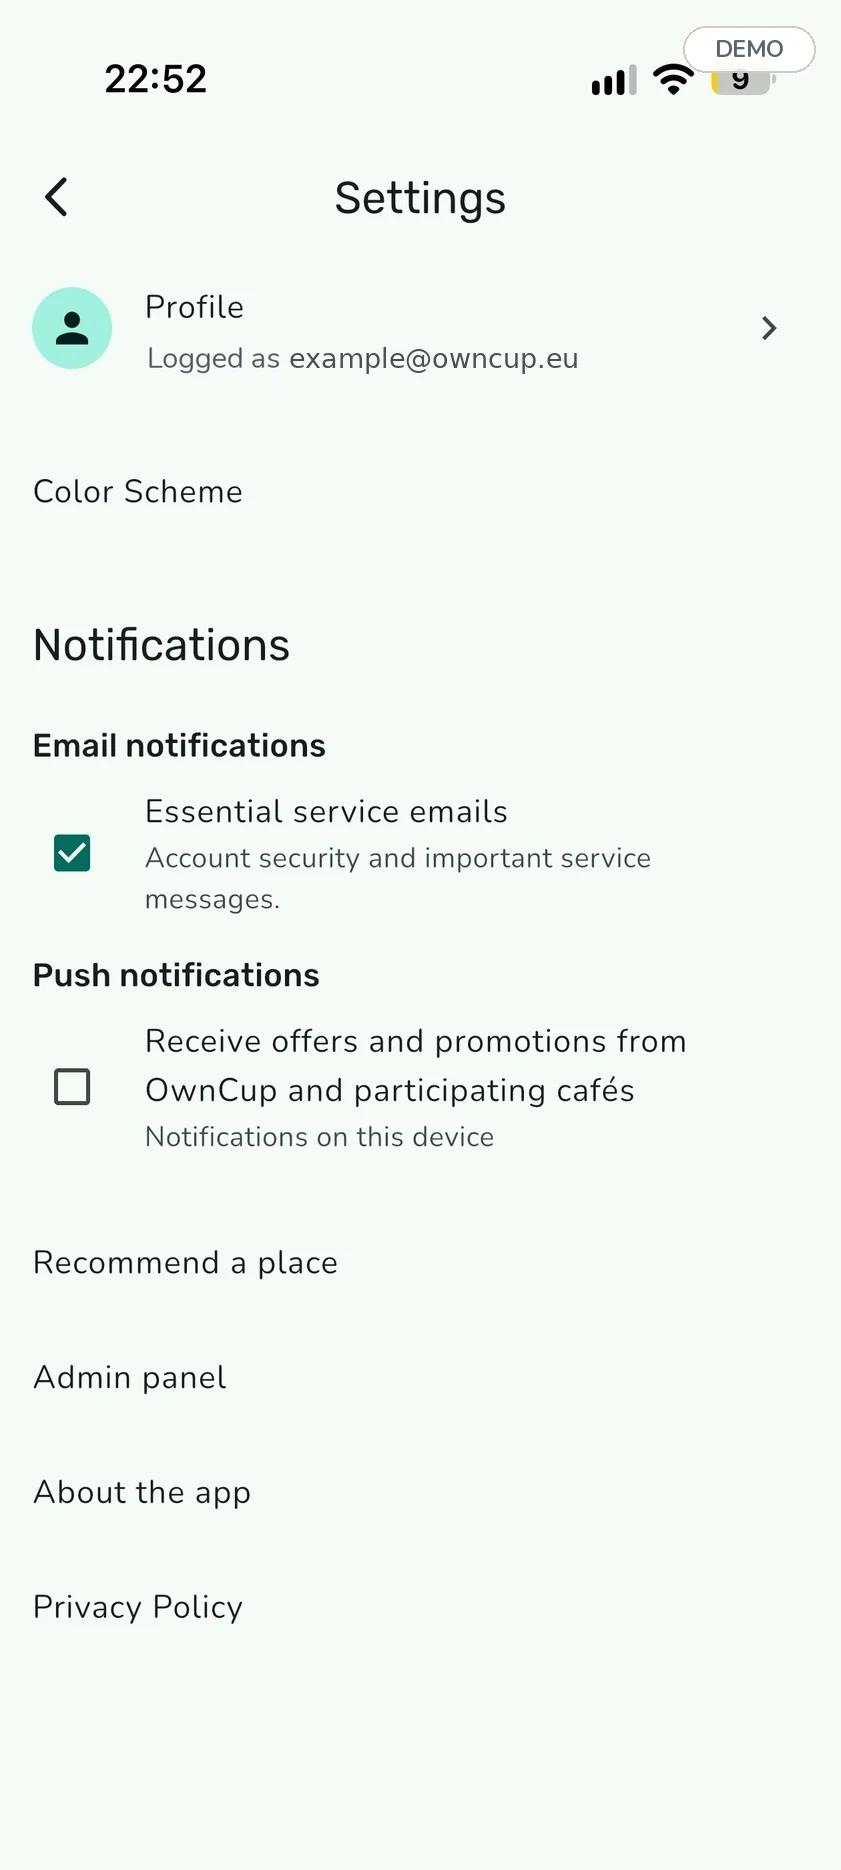
Choose “Recommend a place”
In settings it sits right below the notifications block. That is where adding a place starts.
- 04
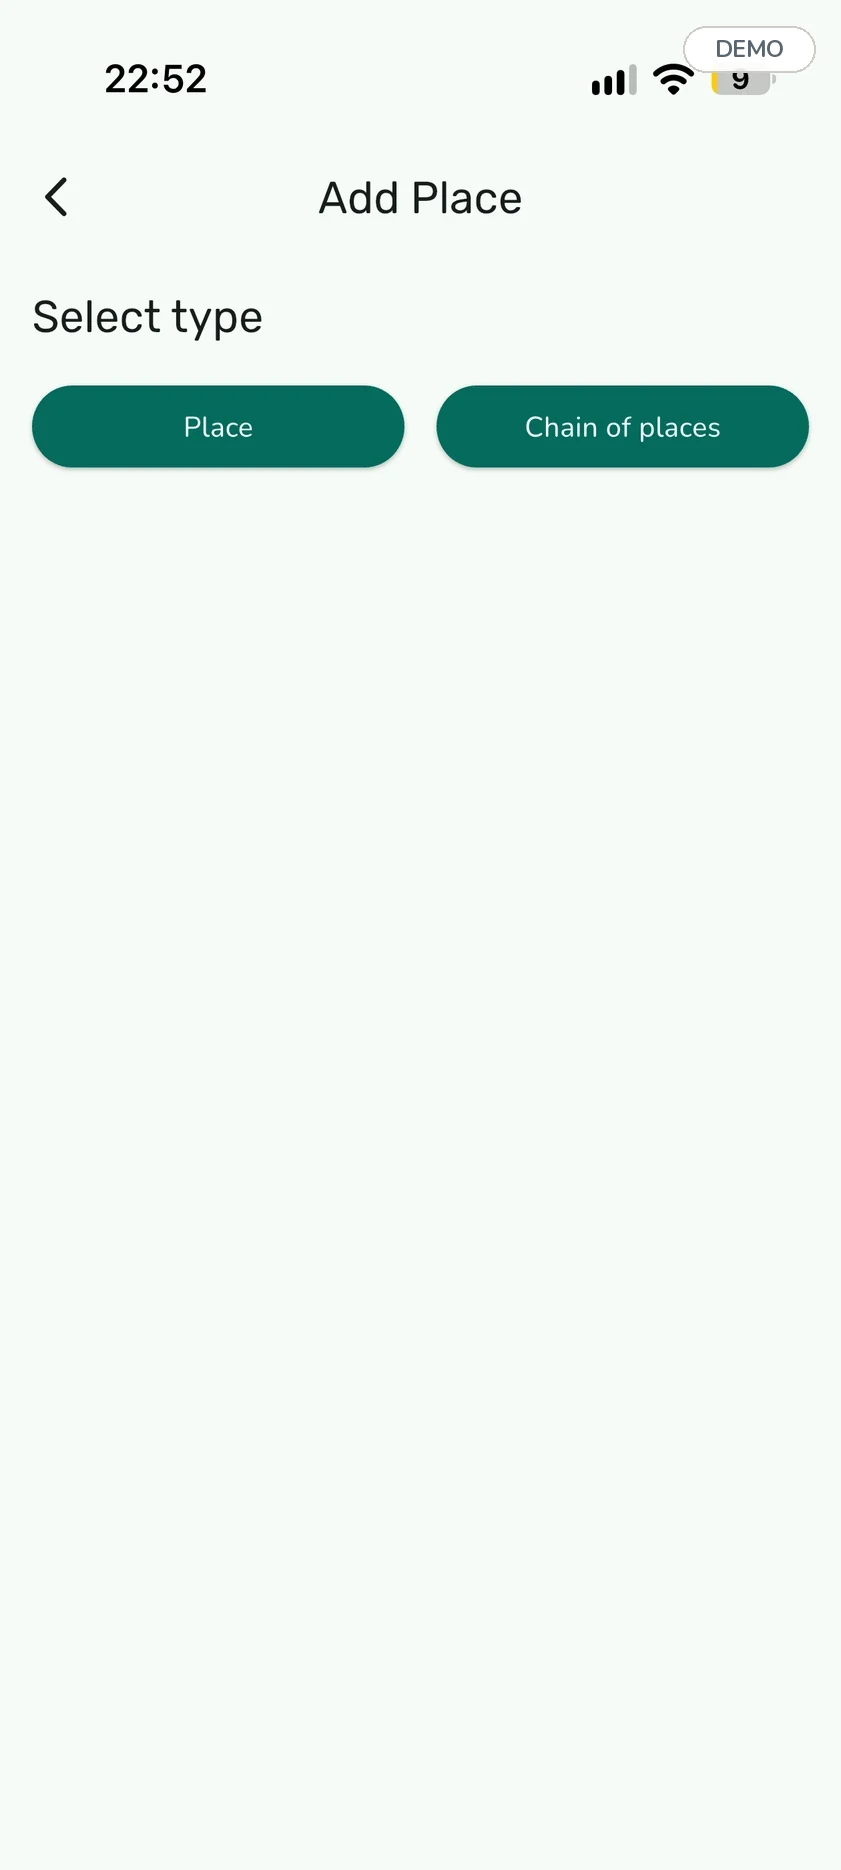
Choose what you are connecting
The app asks for the type: Place — a single café, Chain of places — several locations with shared settings. One location does not need a chain; you can build a chain later if more places appear.
- 05
Find the place on the map
Start typing the name — the app suggests matches from the places directory. Pick yours: address, photo and hours are filled in automatically.
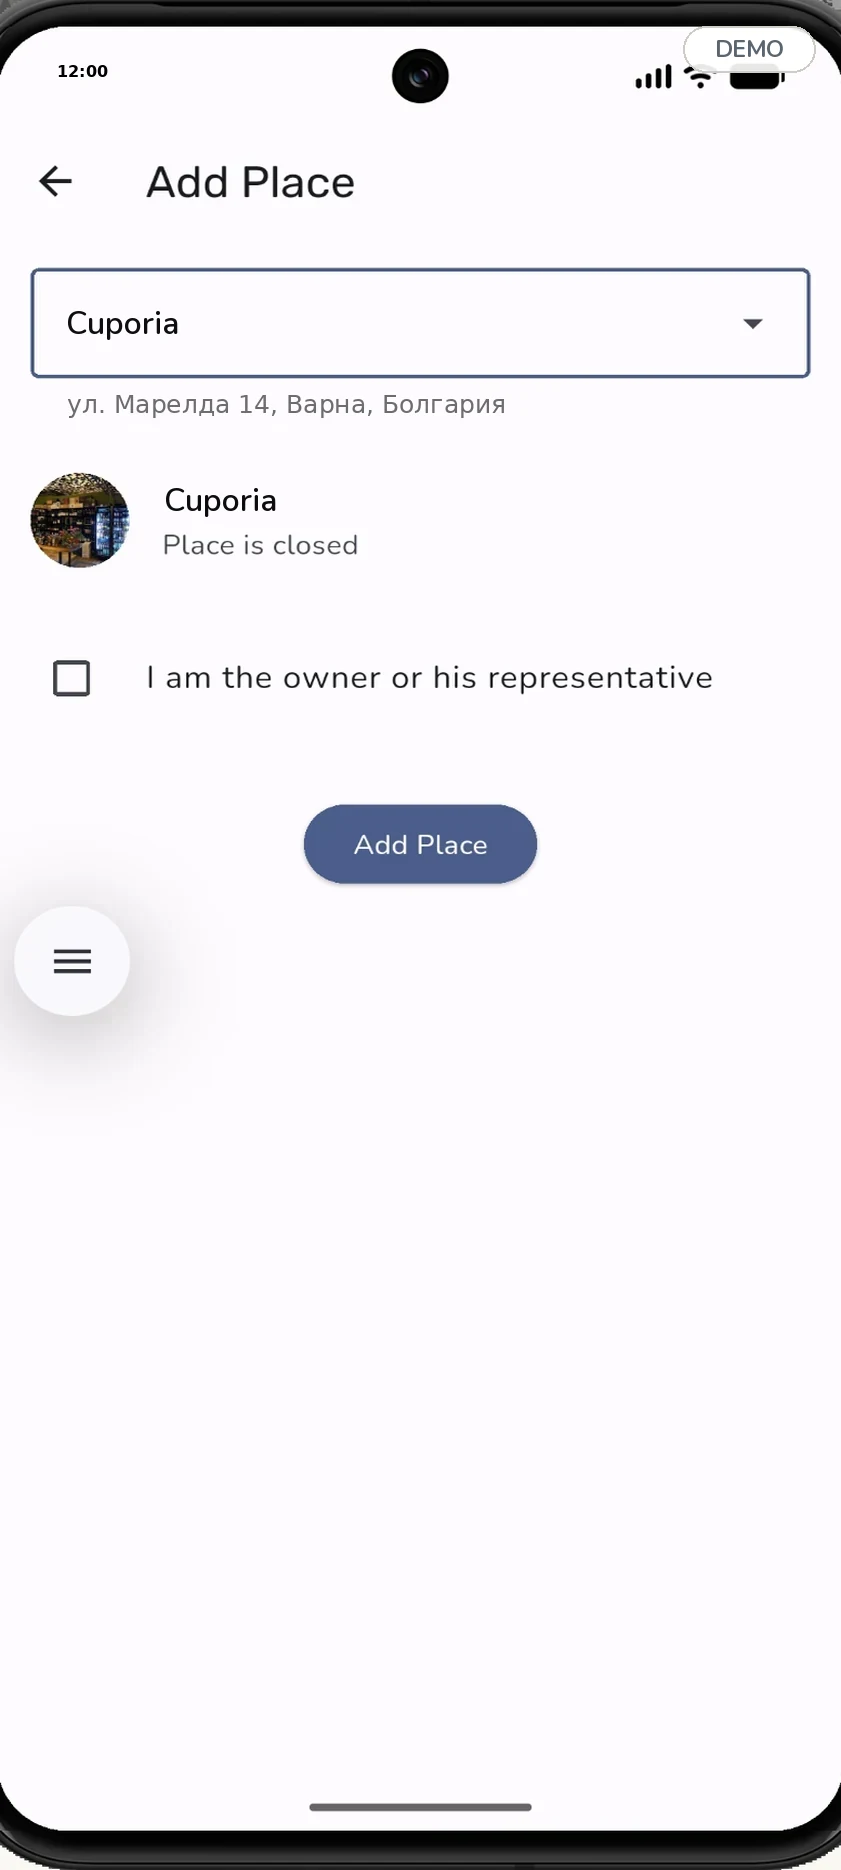
- 06
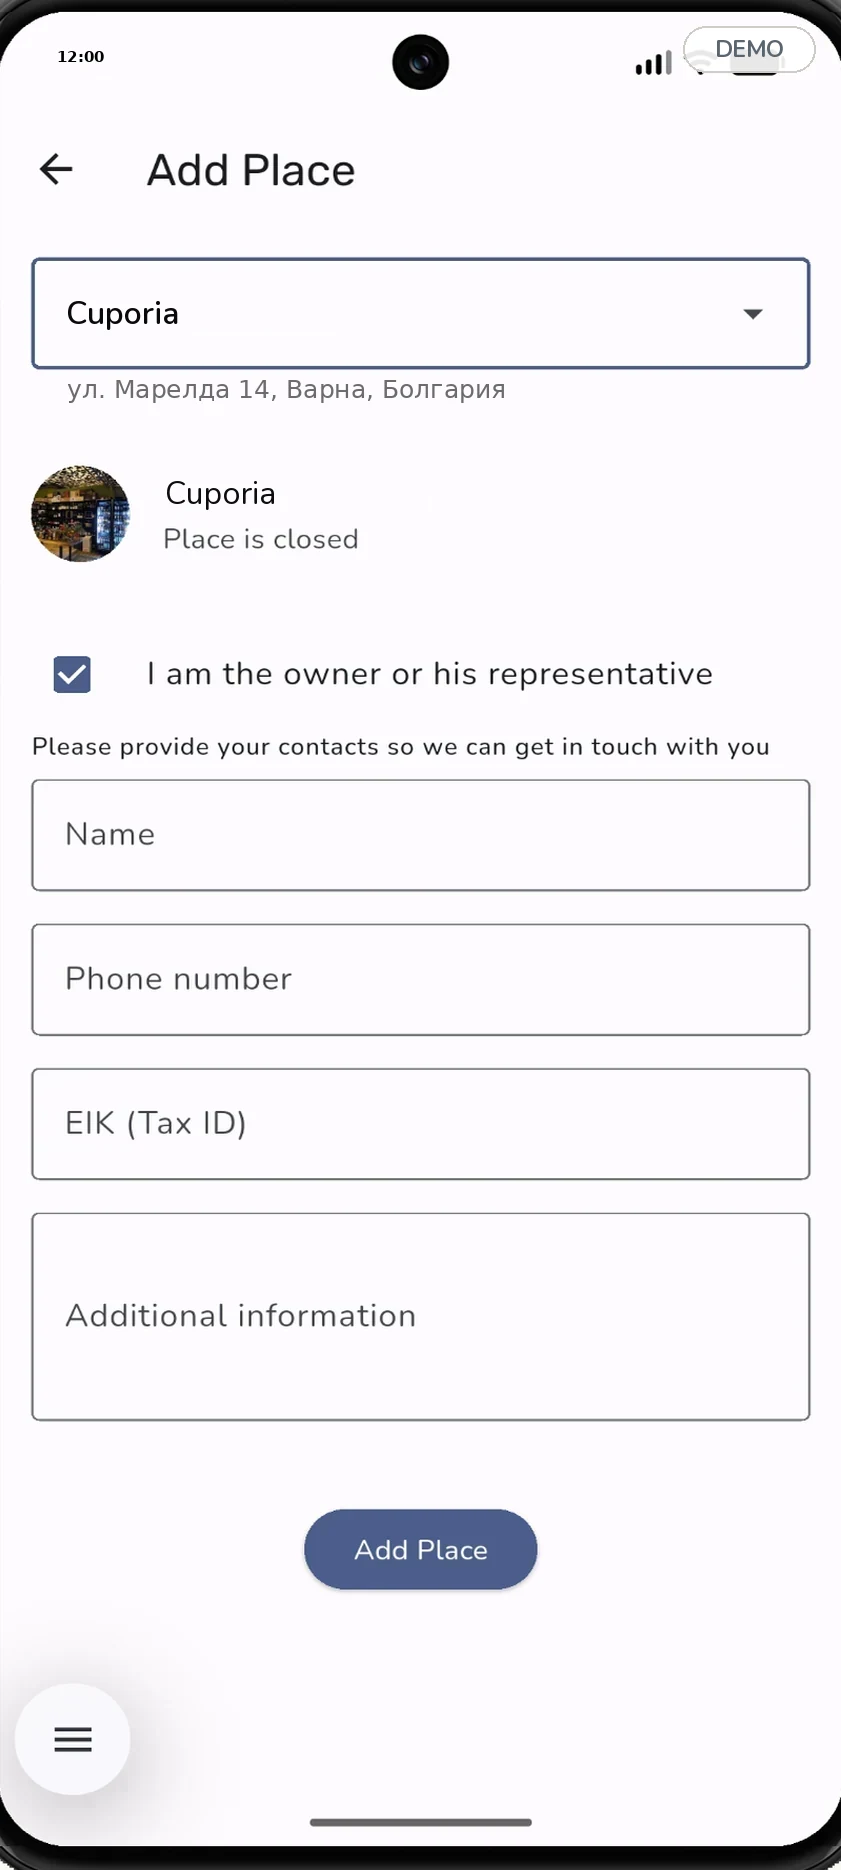
Confirm your authority and leave contacts
The contact fields appear only after you tick “I am the owner or his representative”. Then name, phone and EIK (Tax ID) — the Bulgarian company number. The “Additional information” field is for anything that helps the review: a website, a social media page, a note about the name.
- 07
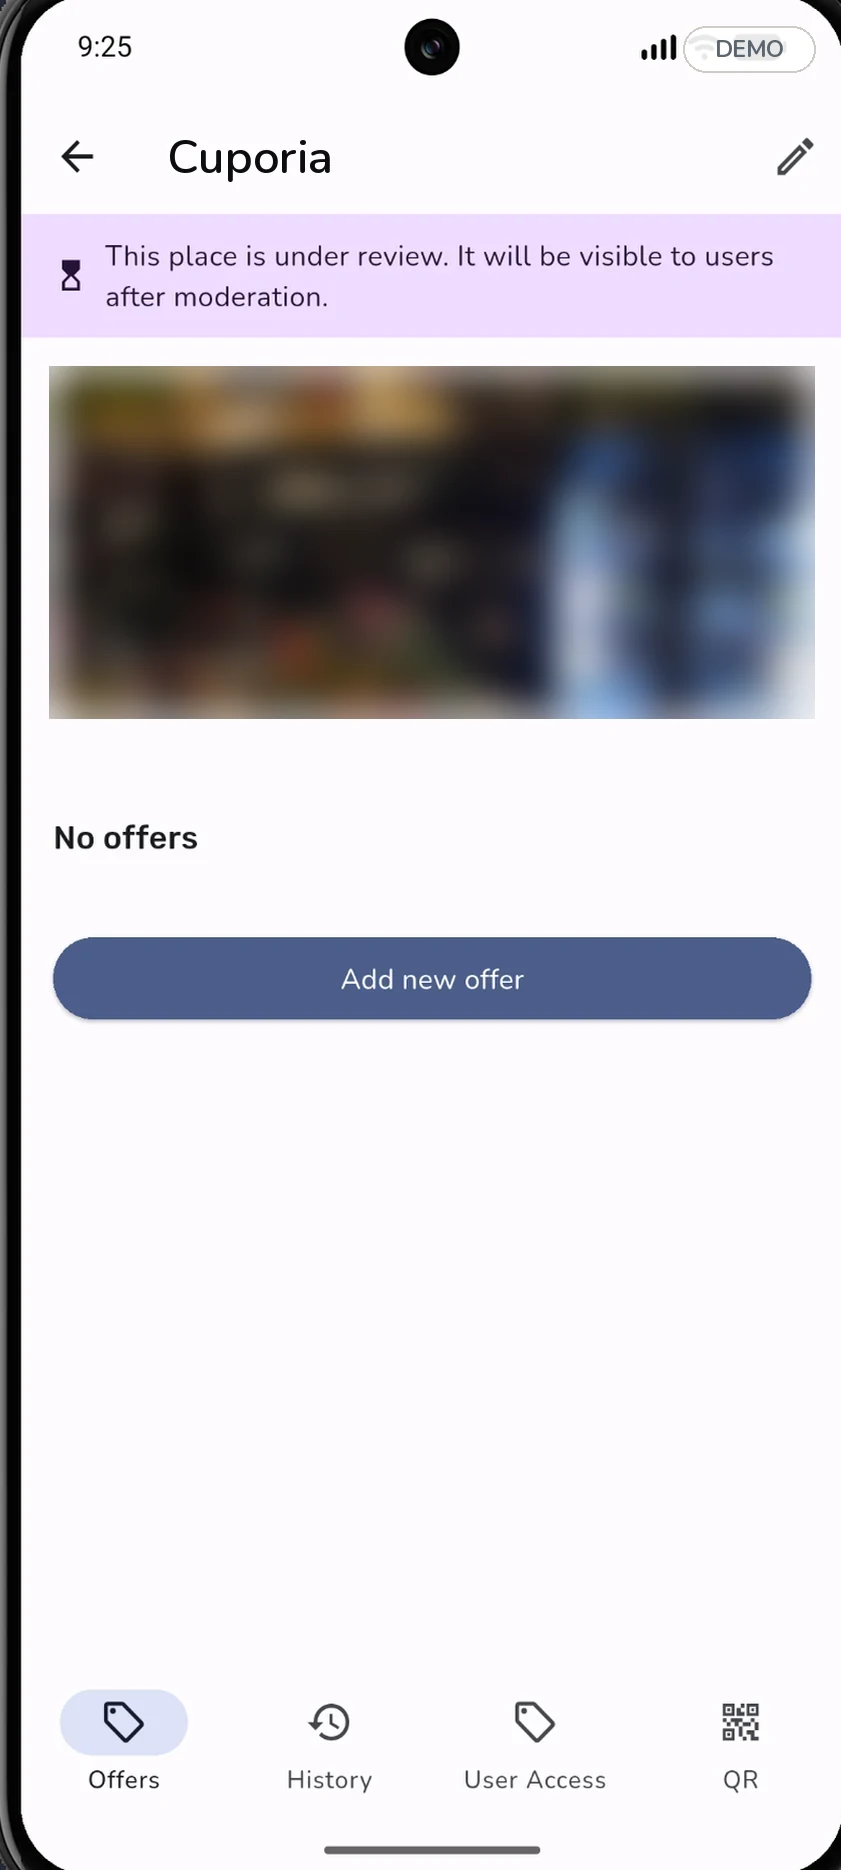
Wait for the review to be completed
OwnCup reviews the place before it is published. While the review runs, the card shows the banner “This place is under review. It will be visible to users after moderation”. Meanwhile you can fill in the profile and prepare offers — guests cannot see the place yet.
- 08
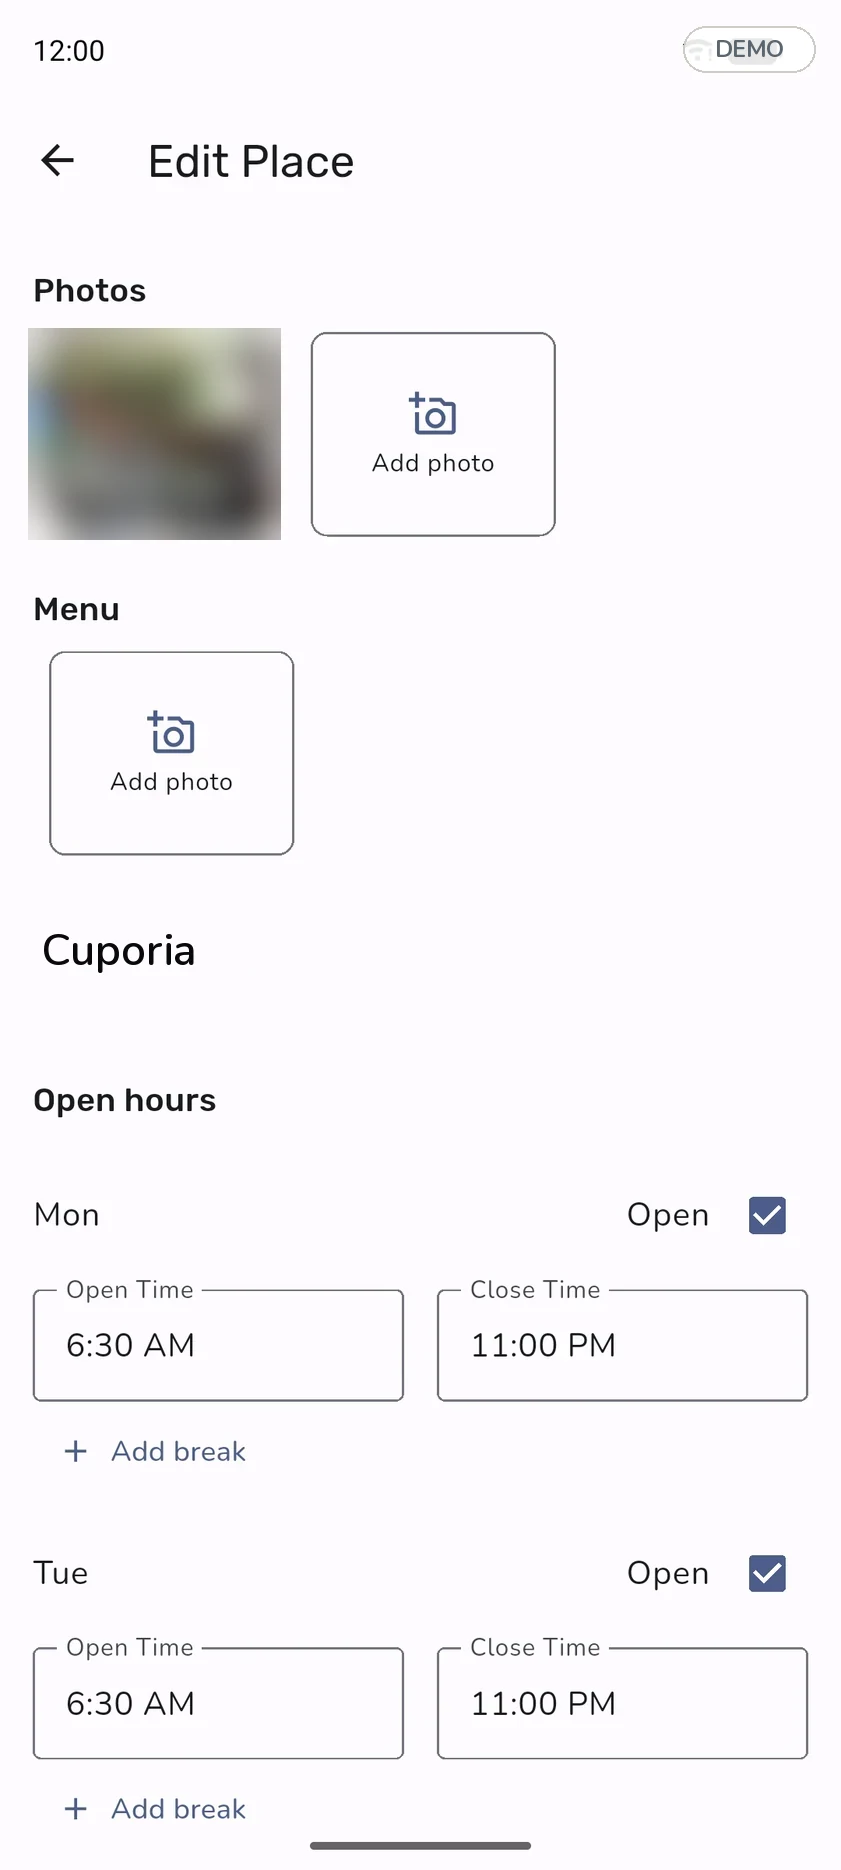
Fill in the profile
Photos, menu, opening hours per day. Each day has an “open” switch, opening and closing time and an “Add break” button for a break. Holidays are set separately.
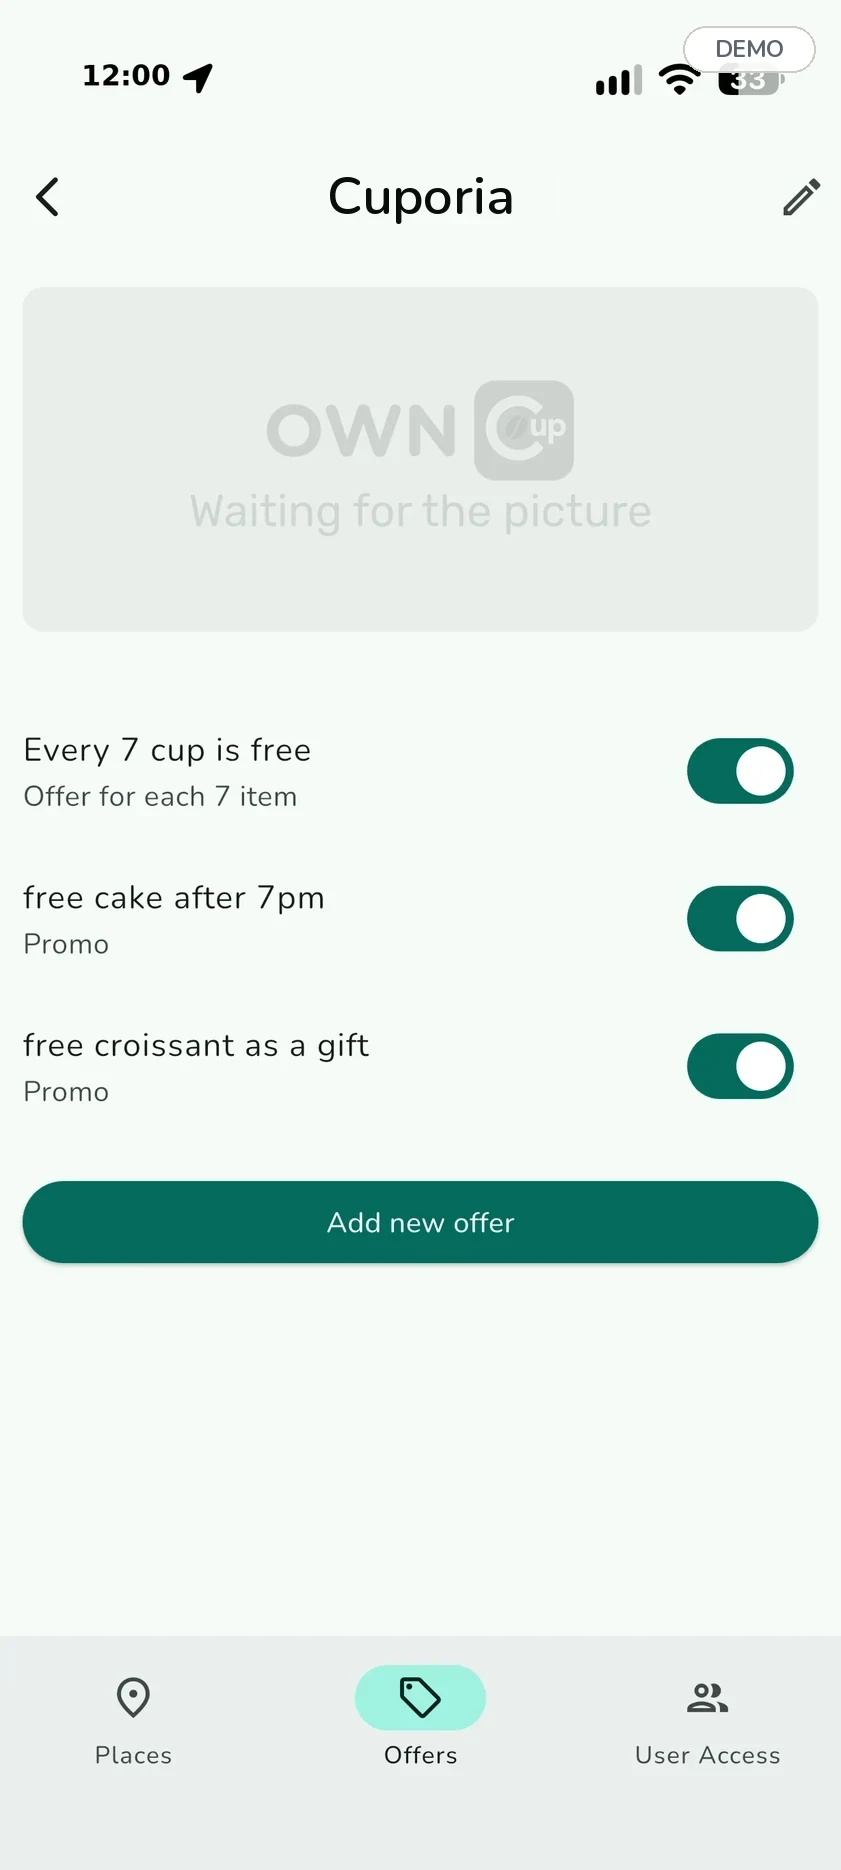
A place with no photo shows guests the “Waiting for the picture” placeholder. One real photo of the room works better than a logo.
- 09
Create an offer
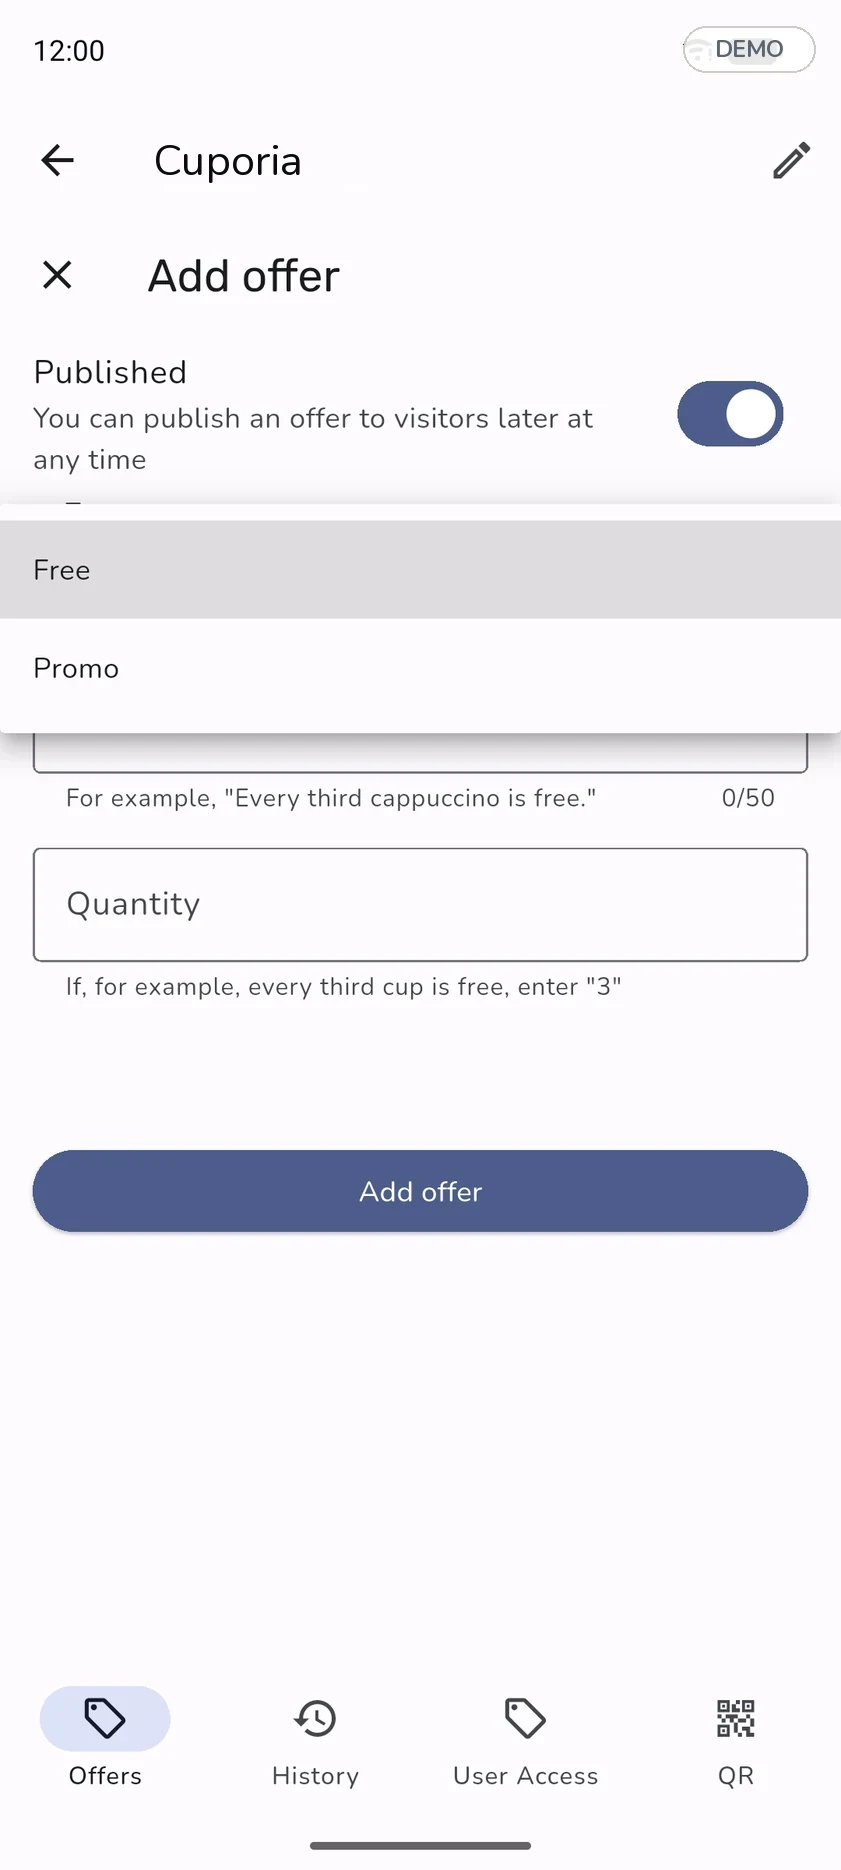
There are two types, and they serve different purposes:
- Free — a stamp-based reward offer. You set the quantity: “every seventh cup is free”. The guest sees the progress in the app.
- Promo — one-off. Description only, no counter: a discount during certain hours, a gift with an order.
The description is limited to 50 characters. The “Published” switch lets you prepare an offer in advance and turn it on later.
- 10
Check how a stamp-based offer is filled in
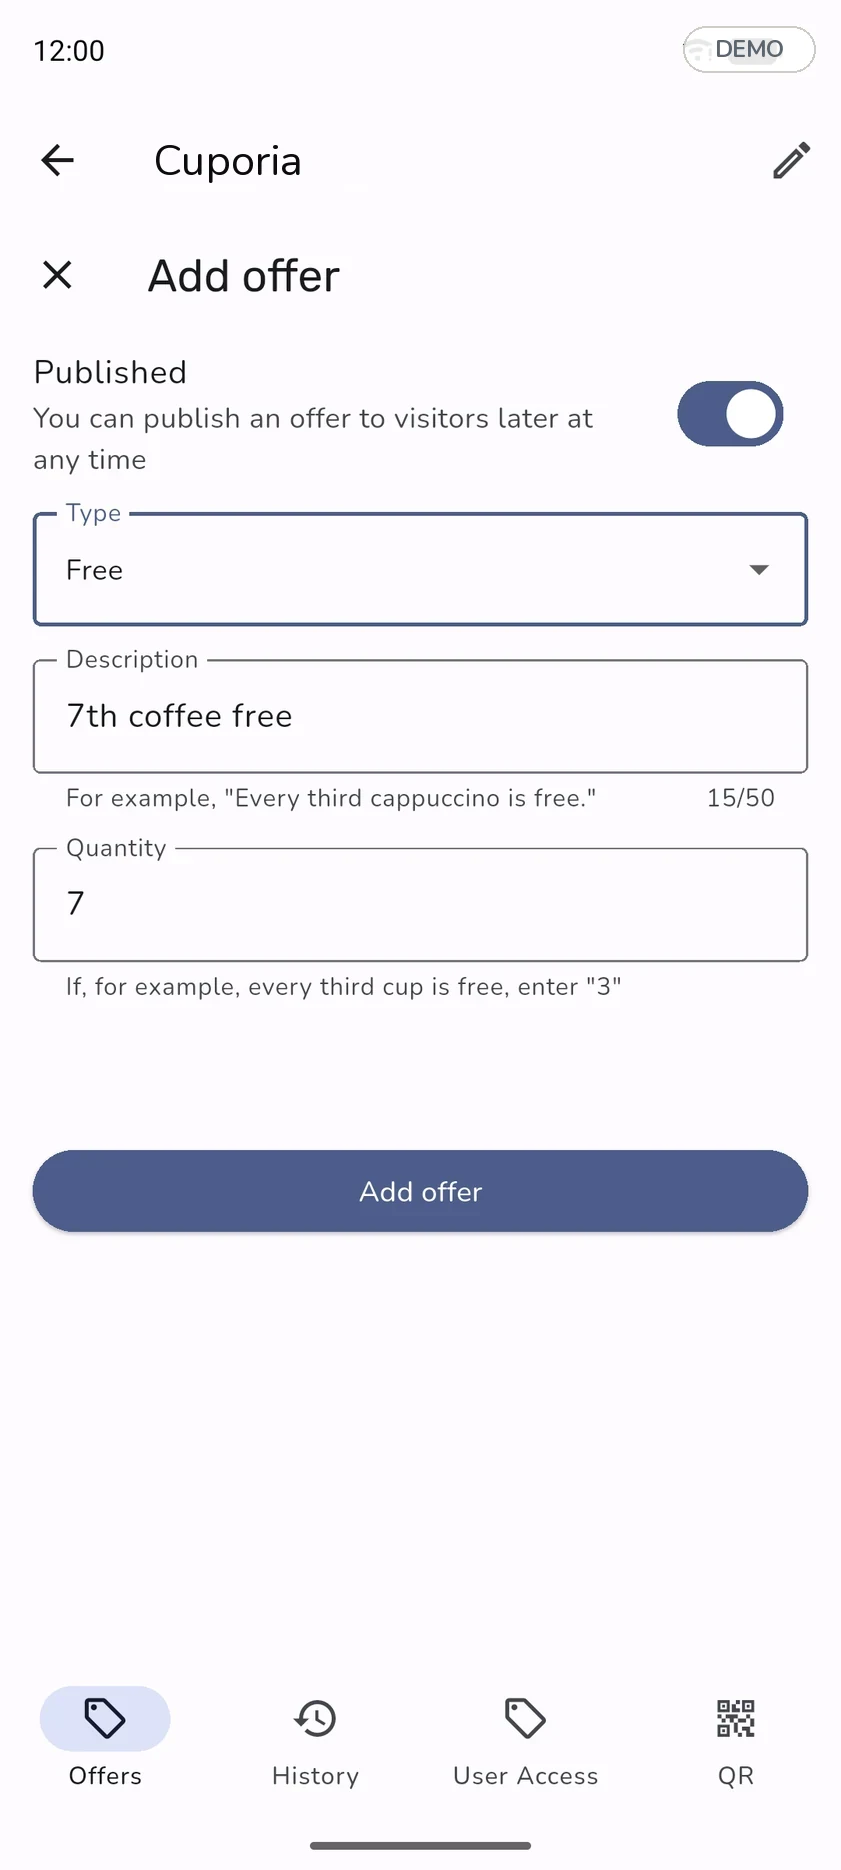
The Free type needs two fields: description and quantity. If every seventh cup is free, “Quantity” is 7. The number has to match what the description says, otherwise the guest and the staff will count differently.
- 11
Put up the QR code
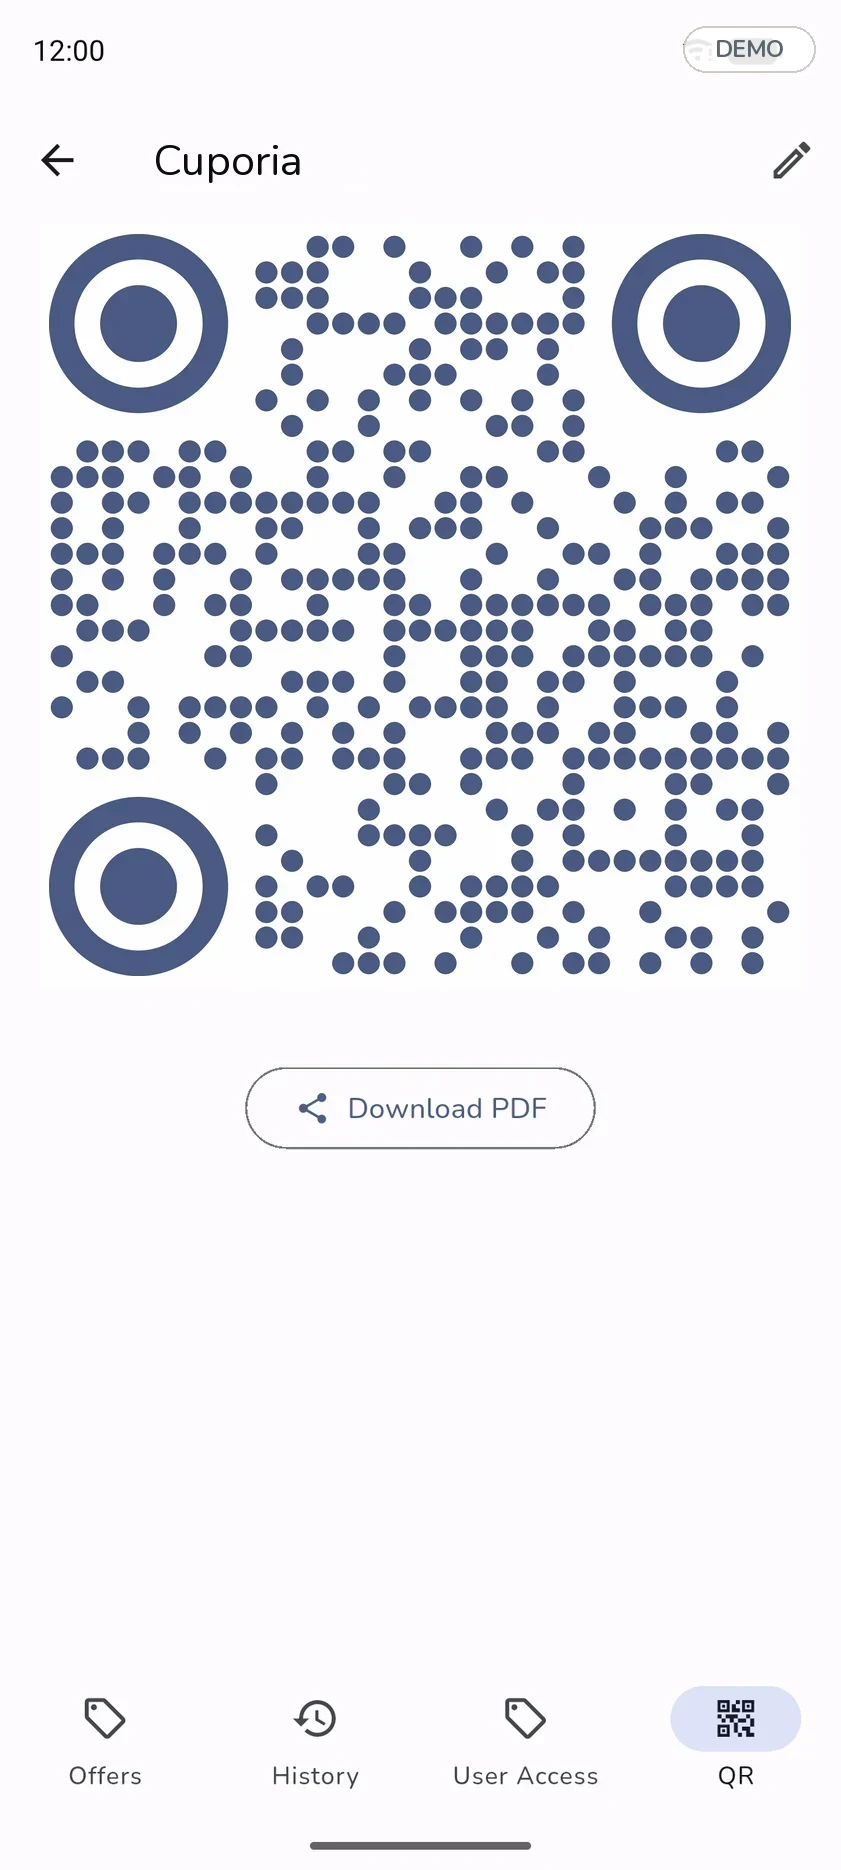
The location’s QR code lives in the QR tab. The “Download PDF” button exports a ready card for printing. The code is scanned by the guest — so it belongs where a guest can comfortably reach for a phone: on the counter, on the table, by the till. After scanning, the guest picks an offer and the staff member gets a notification and confirms the request on their device.
Every location has its own code. In a chain the codes differ — do not mix them up when printing.
- 12
Give the team access
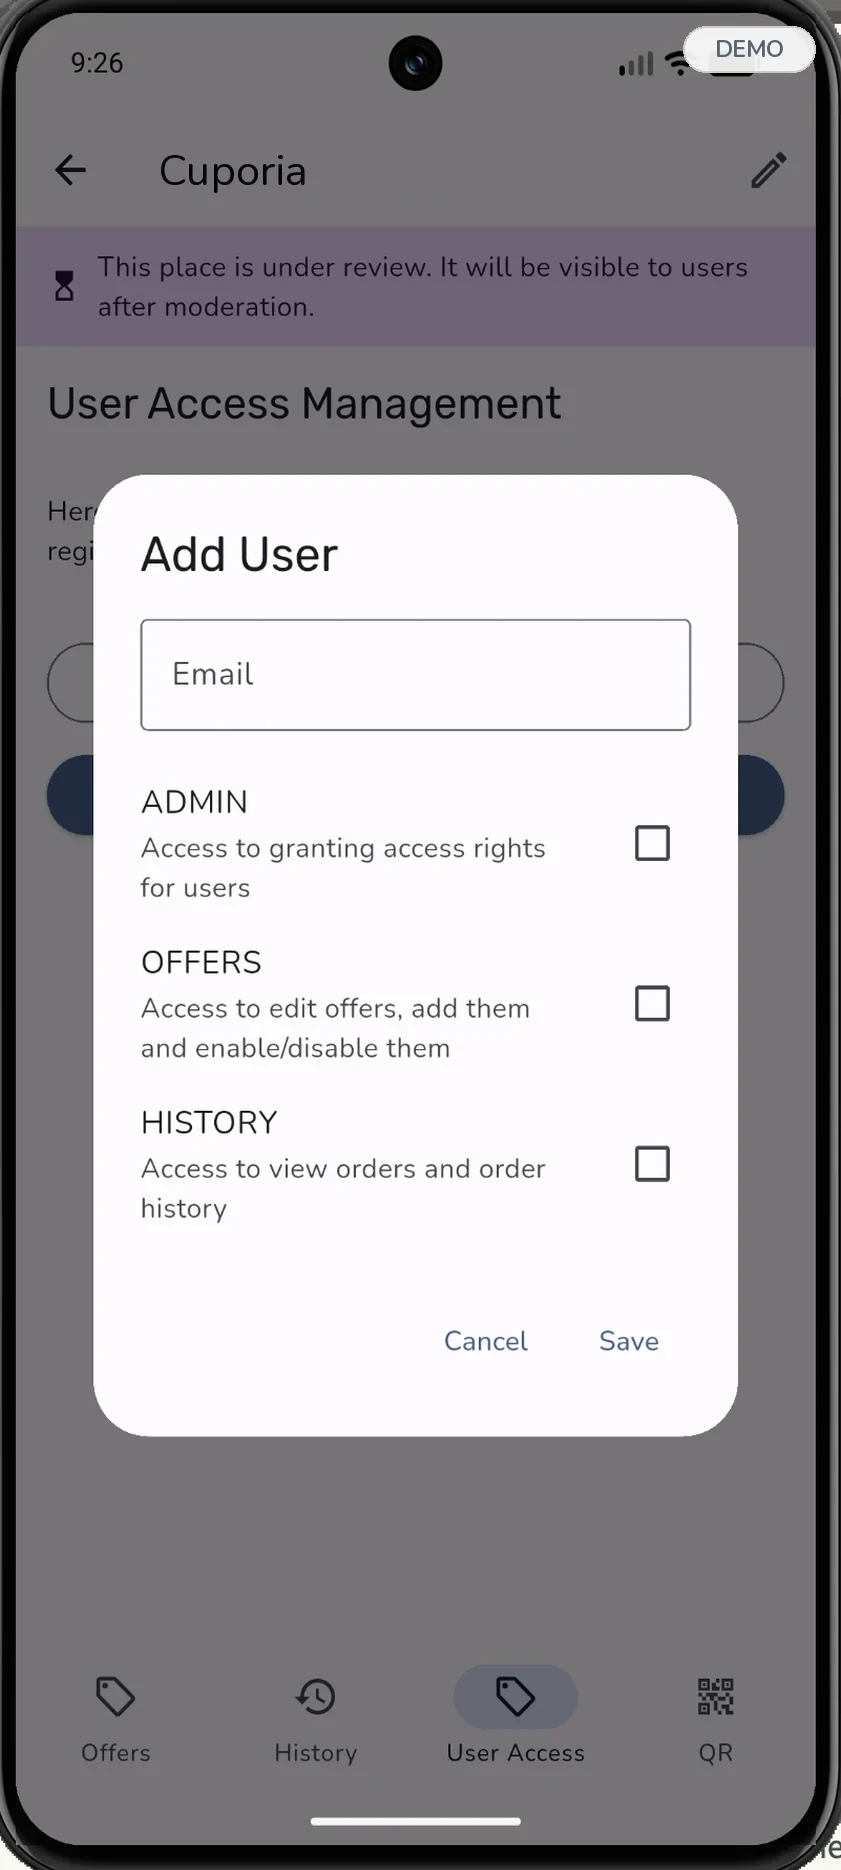
Staff are invited by email. Permissions are granted separately, as three independent checkboxes: ADMIN — granting permissions to others, OFFERS — creating and editing offers, HISTORY — viewing orders and confirming operations. There are no named roles: you assemble the set of permissions each person needs.
What the staff member does
- Shows the guest where the café’s QR code is.
- The guest scans the code, picks an offer and taps “Apply”.
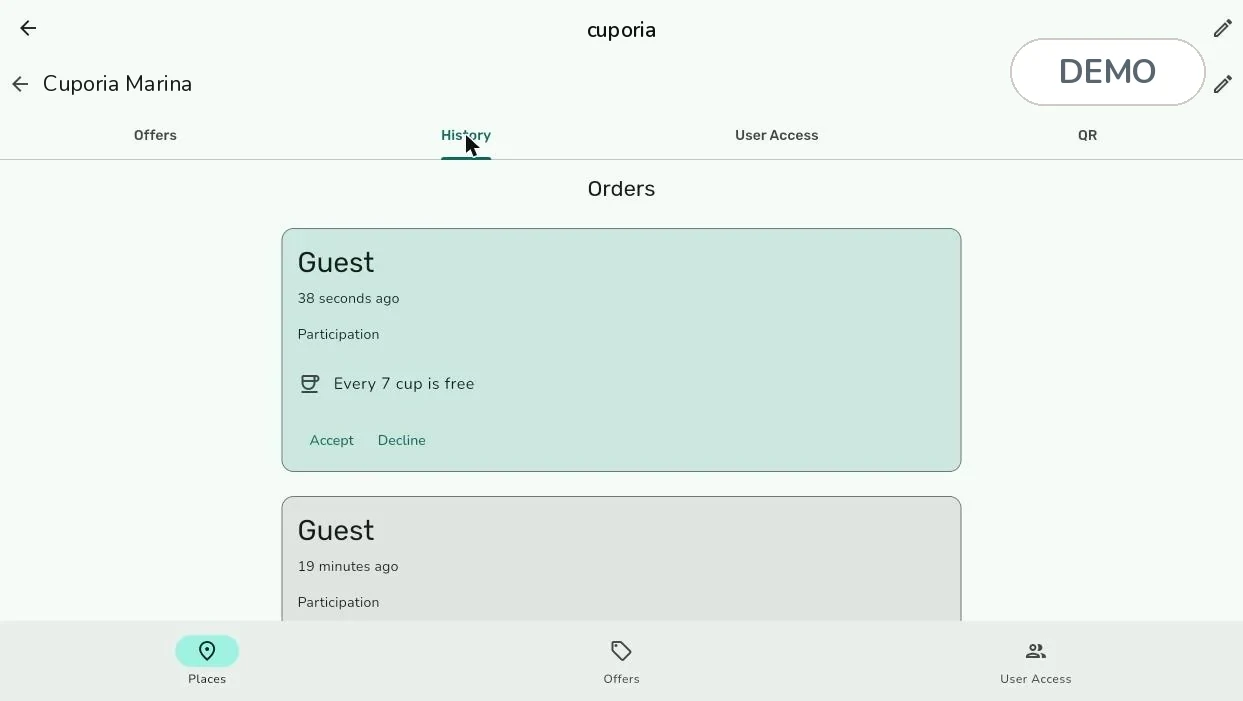
- The staff member gets a notification, and a new operation card appears in the place’s History tab — with the guest’s name, the offer and the time. The notification arrives both on the phone and on the computer: confirm from whichever device is at hand on shift.
- Taps Accept if the purchase matches the terms, or Decline if it does not. After Accept the card is marked “Accepted”.
- Provides the reward stated in the offer.
The stamp counts only after Accept. Scanning alone does not award a stamp — it just opens the place’s list of offers for the guest. No till integration is required.
The right to confirm operations comes from the HISTORY checkbox in the permissions. Without it a staff member does not see the History tab and cannot confirm a purchase.
What changes with several locations
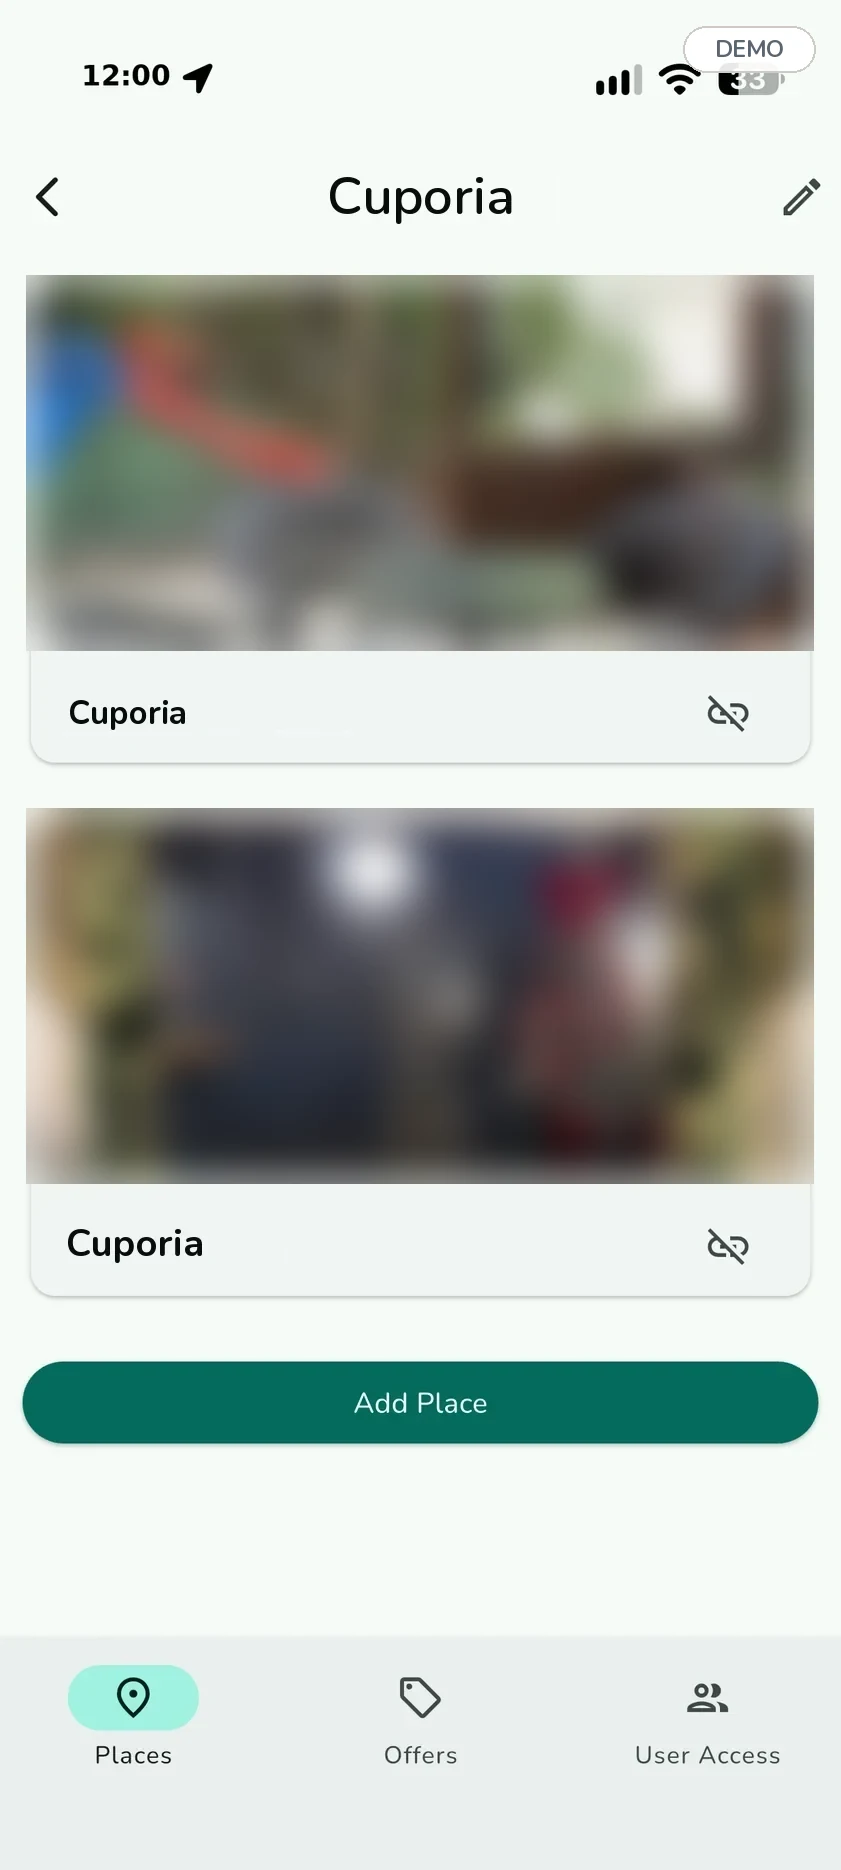
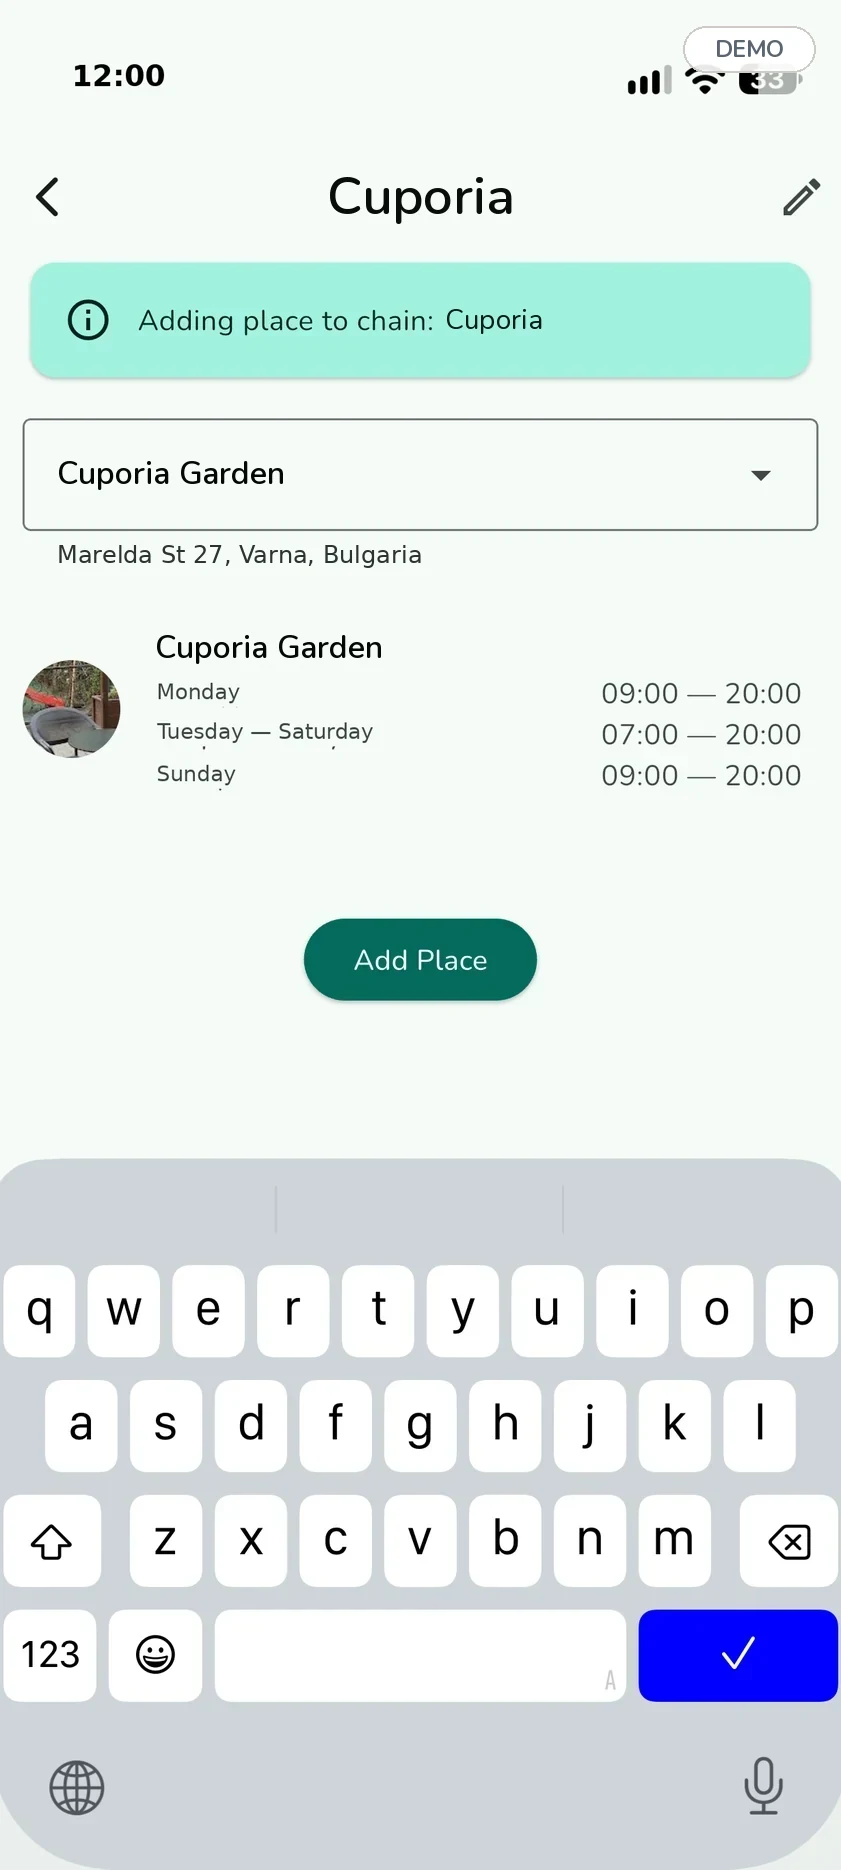
A chain has a shared profile and shared offers, but every location keeps its own photos, opening hours and its own QR code. A chain has three sections at the bottom — Places, Offers, User Access; a single location has four tabs, including QR.
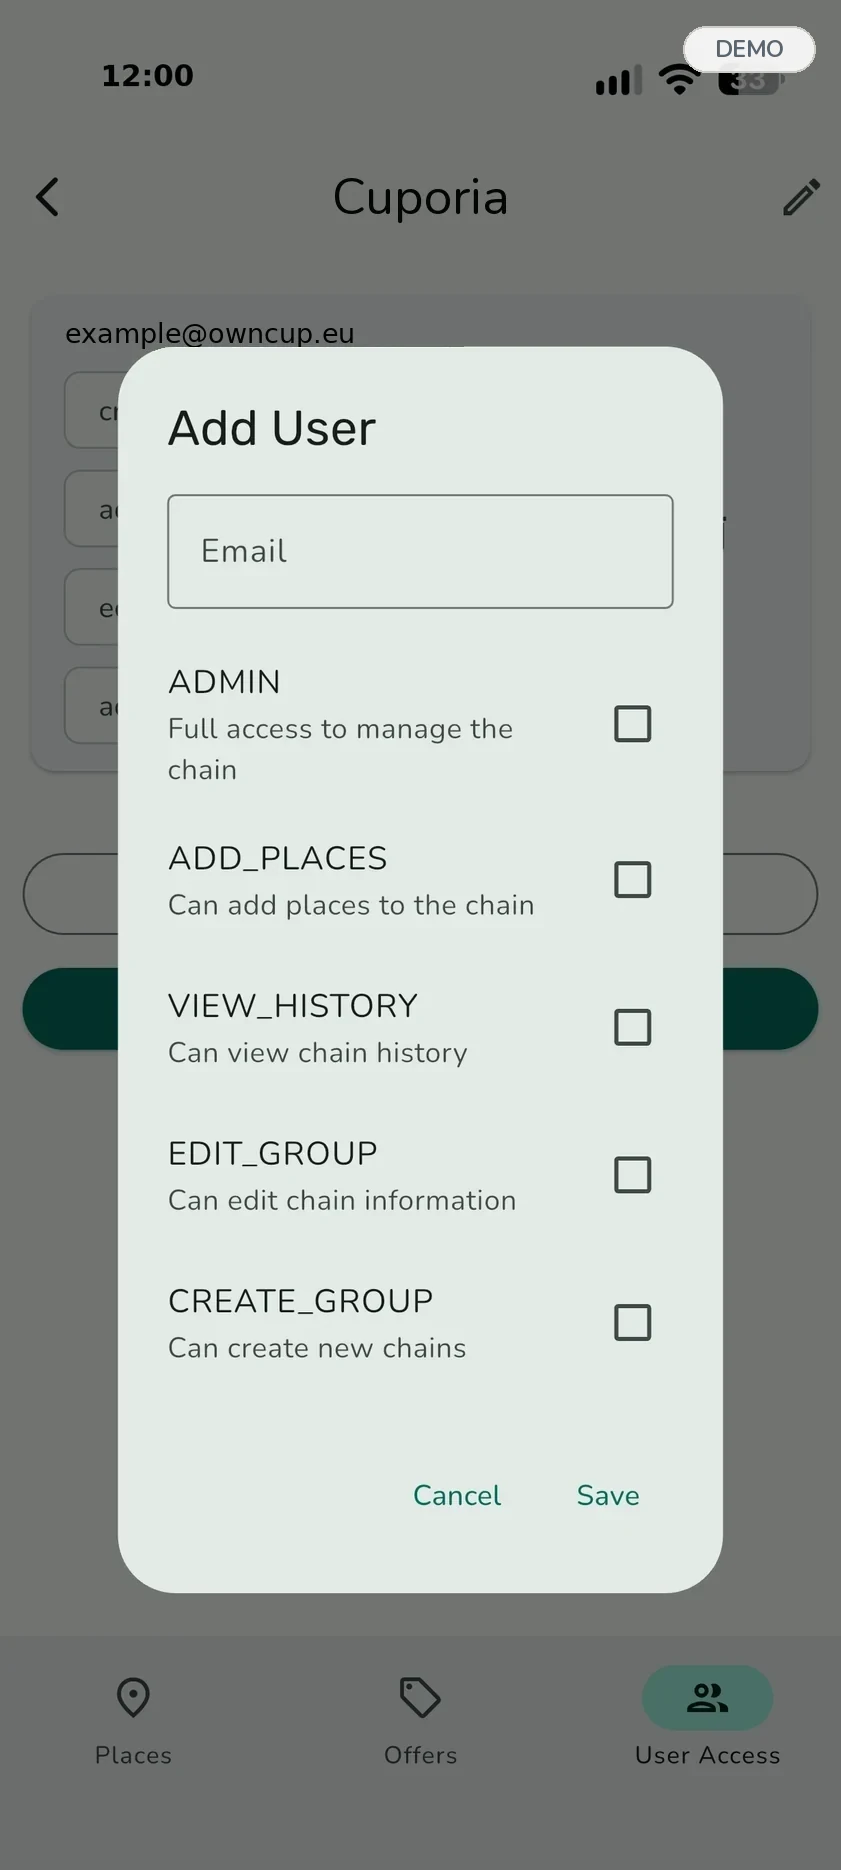
Permissions are granted at two levels, and the sets are different. At chain level the Add User dialog has five checkboxes: ADMIN — full access to manage the chain, ADD_PLACES — add places to the chain, VIEW_HISTORY — view the chain history, EDIT_GROUP — edit the chain information, CREATE_GROUP — create new chains. At location level the checkboxes are different — ADMIN, OFFERS, HISTORY — and they apply to that location only. That is why a barista in one café does not see the operations of the one next door until they are given a chain-level permission.
If the location has no work phone
The back office runs fully in a browser, at the same address — app.owncup.eu. The sections are the same: Admin Panel, places, chains, offers, the QR code and History with operation confirmation. A staff member at the till computer needs no phone.
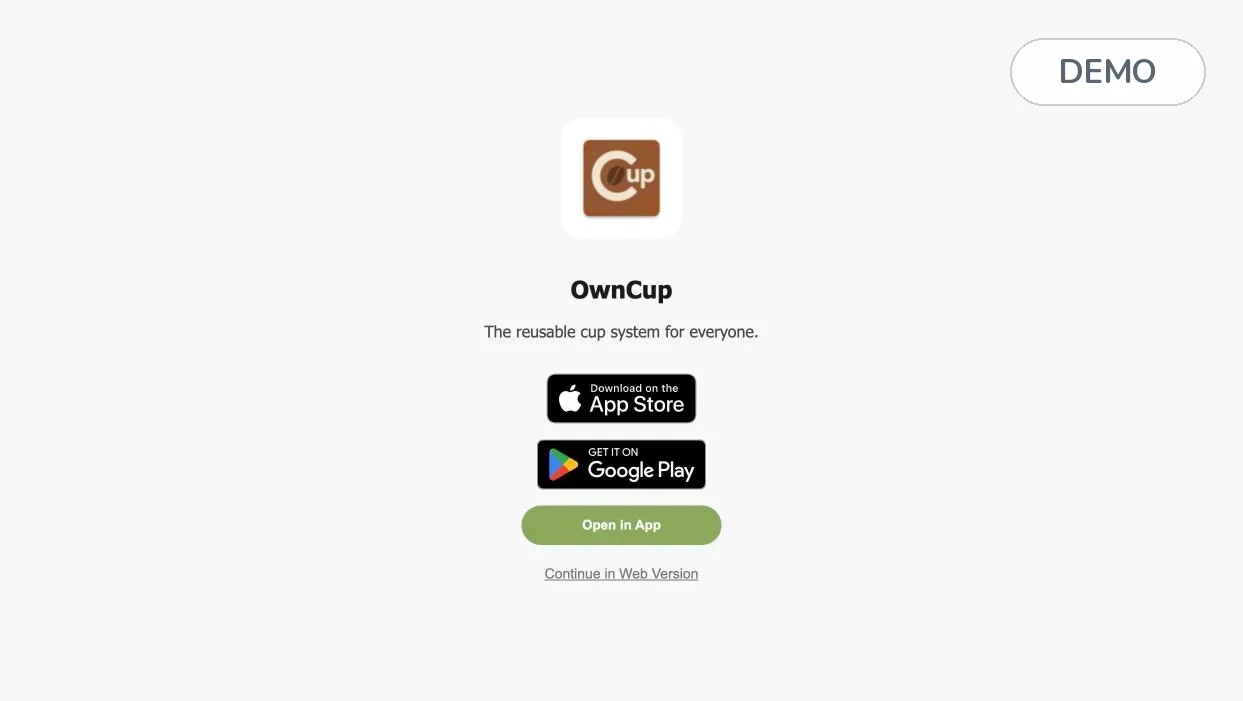
- Open app.owncup.eu. First comes a screen with App Store and Google Play buttons — tap the “Continue in Web Version” link below them. That screen appears on every visit, including from a bookmark.
- Sign in with the work email. Then Settings → Admin panel — and you are in the back office.
- Open the location you need and the History tab. New operations appear in the list automatically; there is no need to reload the page.
- In Settings → Notifications turn on Push notifications and allow notifications in the browser when it asks. Without that, orders are only visible on an open History tab.
If a location belongs to a chain, open it inside the chain, not in the general Places list. A location with the same name can exist in both — those are separate records, and operations reach only one of them.
Before the first shift
- The offer terms and the number in “Quantity” match.
- The QR code is printed, in plain sight and tested by scanning.
- The profile is complete: a photo, the menu and correct hours with breaks.
- Staff are invited and know the short confirmation routine.
- Someone is responsible for the profile and the offers.
- If you work from a computer — the back office opens, browser notifications are allowed, the History tab is checked.
- You have tested the complete process yourself, both as a guest and as a staff member.
Still have questions about setup?
Tell us about the café and the number of locations — we will suggest which scenario fits.